Application Setup and Deployment
1. Create a new Gitlab Project
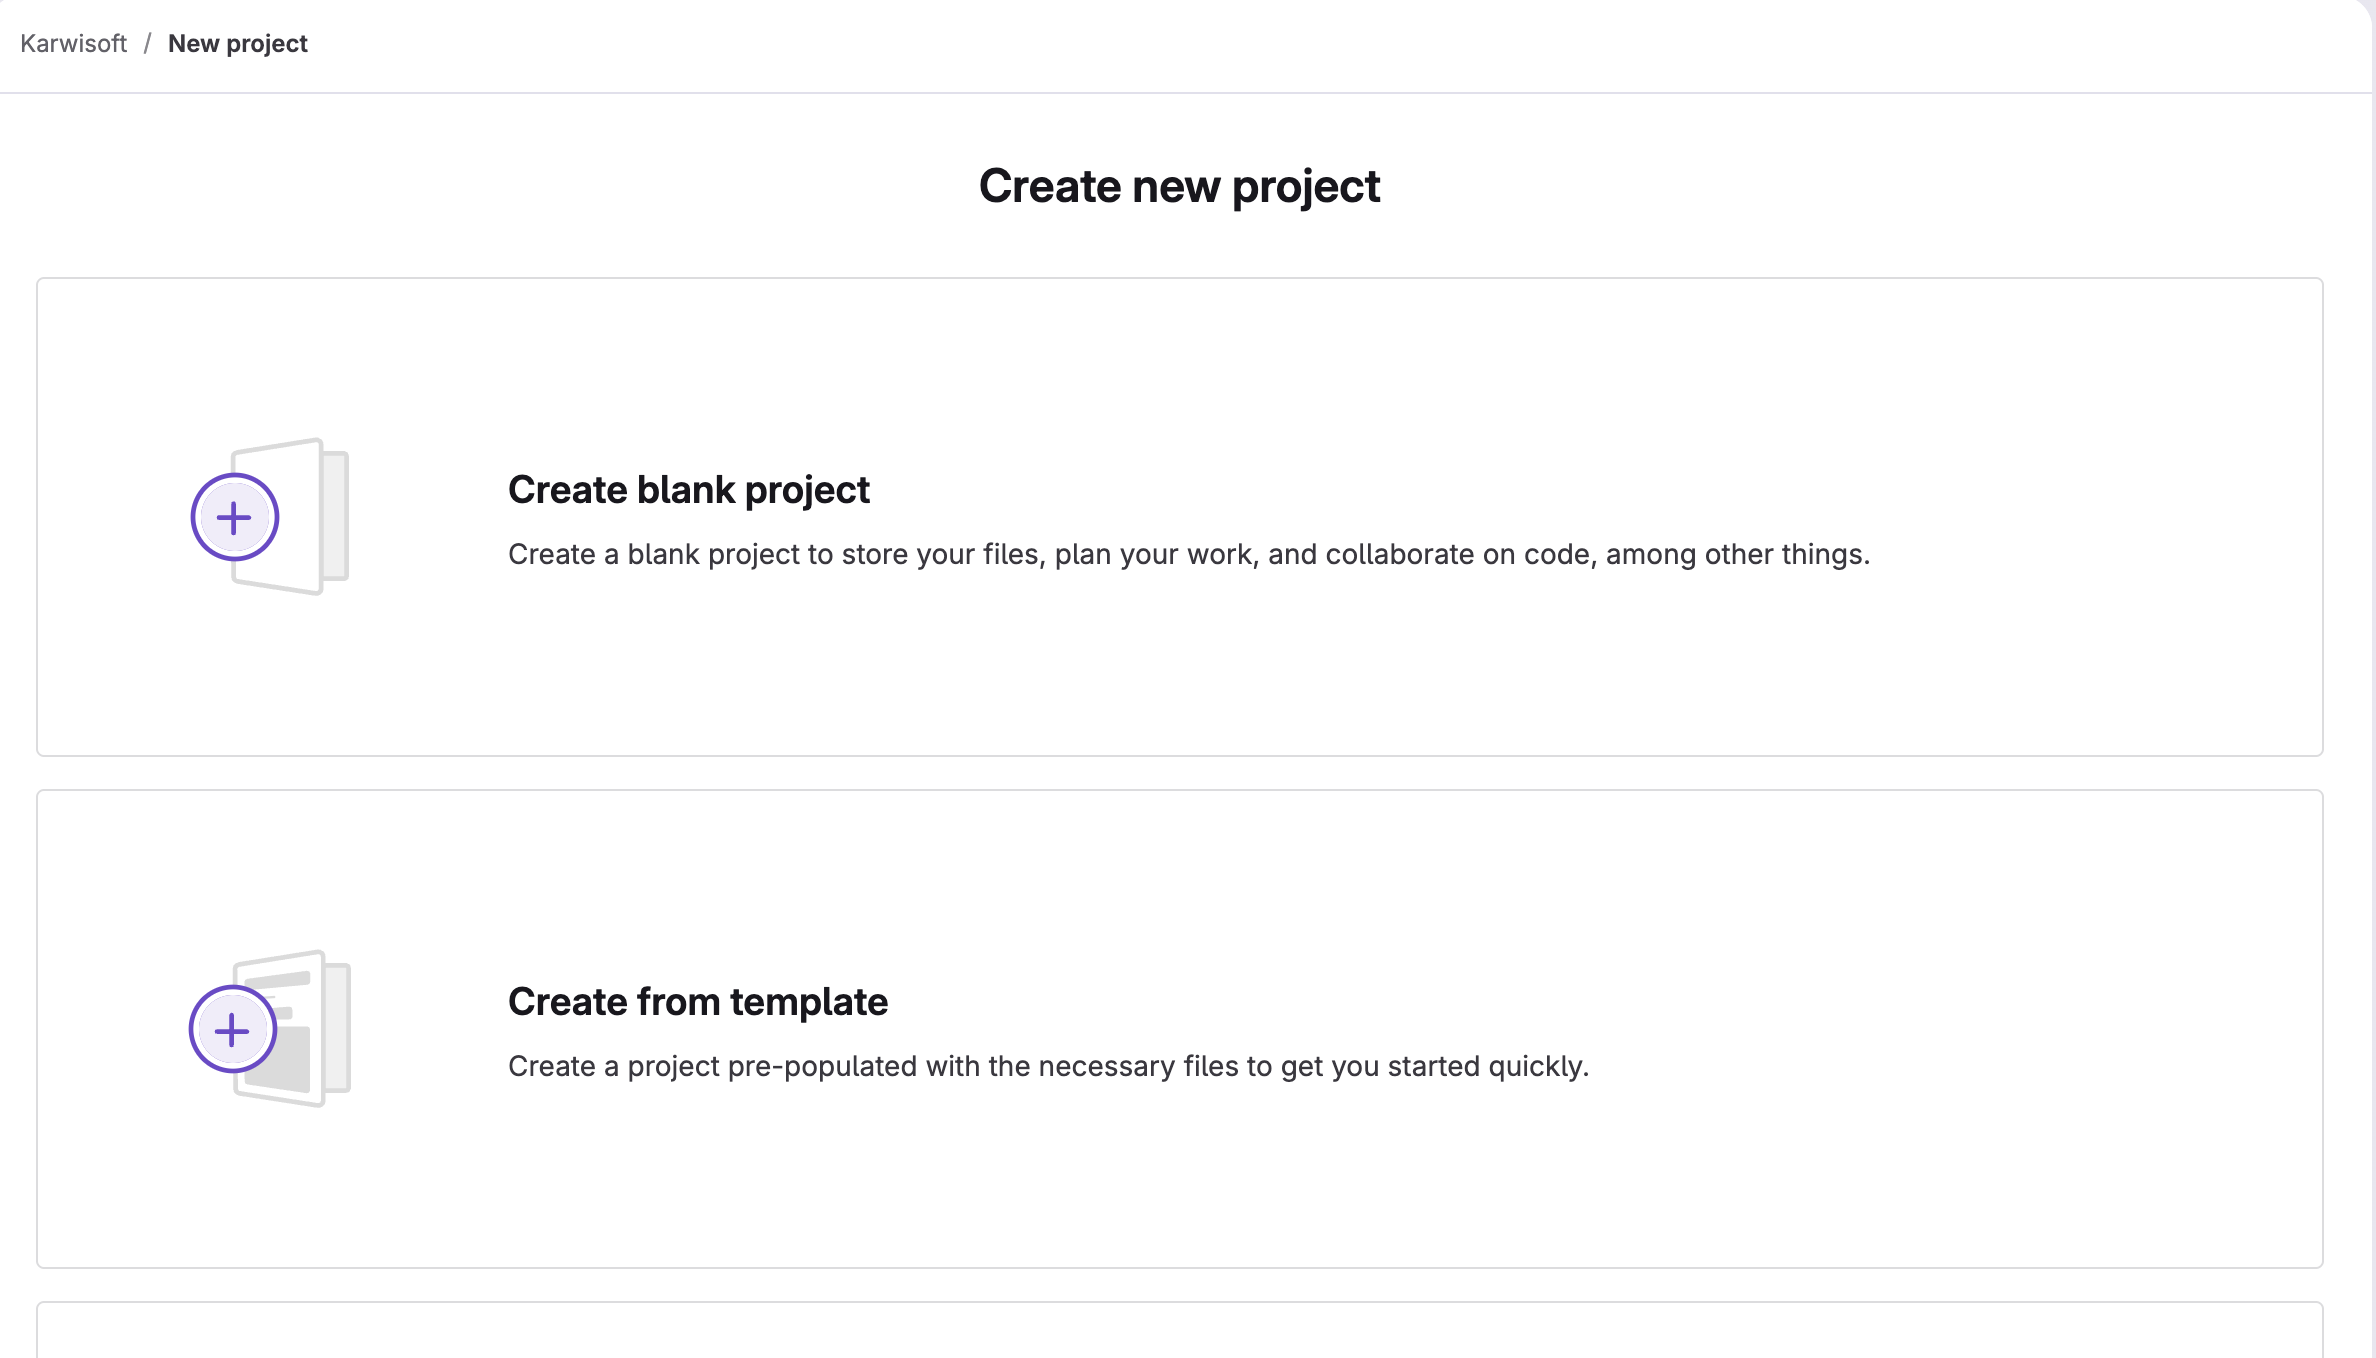
Create the project
This is simply done by heading to the right group and clicking on create new project

Choose project format
Here it's recommended to use a Create blank project
Fill the project informations
Here you just need to enter your Project name
No need to change the other settings
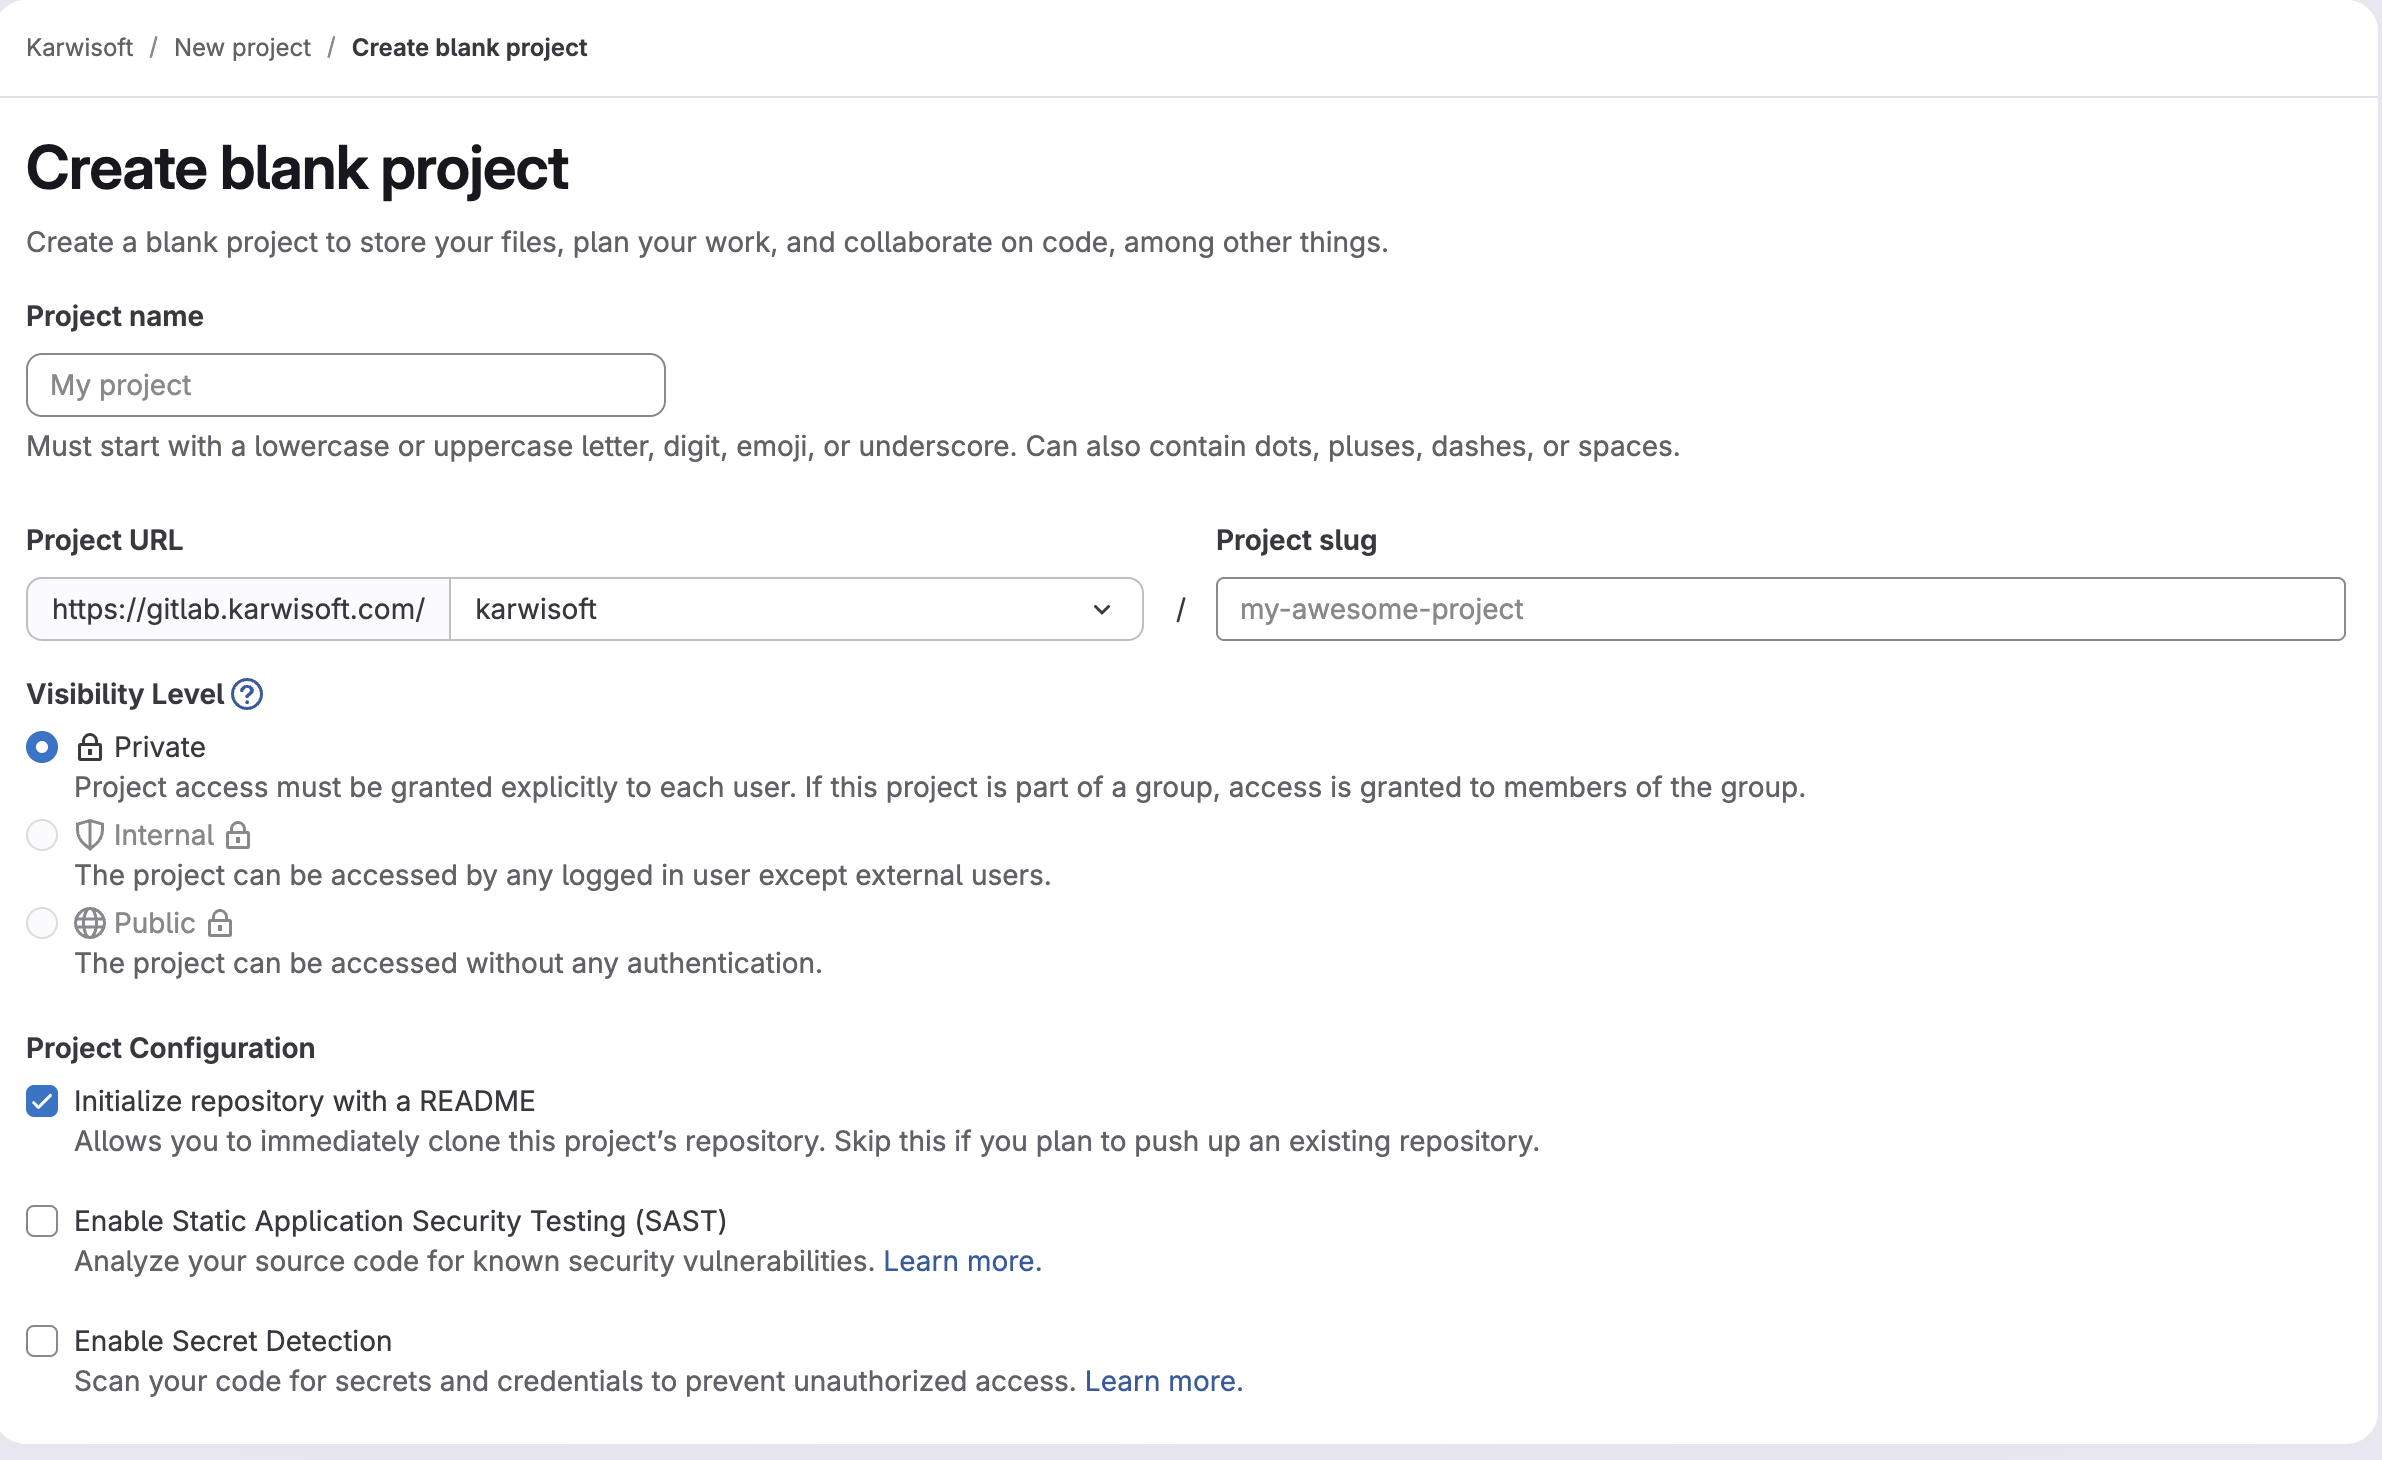
Project creation successful
Here the project has been created successfully with the name test-project
2. Add required merge request template
In order to have a default template to be used automatically in merge requests body
We reccommend that you add this default template. To do that simply
- Create this folder path `.gitlab/merge_request_templates
- Create a file named
Default.md - Copy/Paste the following content:
# Fixes #<ticket_number>
<!-- Replace <ticket_number> with the relevant issue or ticket number -->

# Description
<!-- Briefly describe what this MR changes and why -->

# How to Test
<!-- Step-by-step instructions for testing this MR -->
1. Step one
2. Step two
3. Step three
3. CI/CD Pipeline Setup
Prerequisites:
- You need to have a Dockerfile capable of packaging your application.
- The Dockerfile needs to be built and tested locally to avoid any confusion with the pipeline later on.
Setup
In order to have an automated Gitlab CI/CD you have to set it up by creating a file named .gitlab-ci.yml
at the root directory of your project.
Simple CI/CD Setup (one environment)
If you want to deploy a simple CI/CD setup that deploys to a single environment you need to:
- Copy/Paste this configuration into the previously created
.gitlab-ci.yml
stages:
  - build
  - trivy_scan
  - deploy

include:
  - component: $CI_SERVER_FQDN/components/docker/build@1.0.25
    inputs:
      stage: build
      branches: "main"
      tag: imagesbuilder
  - component: $CI_SERVER_FQDN/components/docker/scan@1.0.25
    inputs:
      stage: trivy_scan
      branches: "main"
      tag: imagesbuilder
  - component: $CI_SERVER_FQDN/components/docker/deploy@1.0.25
    inputs:
      branches: "main" # is the branch that triggers the deployment
      environment: "production" # is the environment name
      stage: deploy # deploy stage
      tag: <target_runner> # Runner in which VM you want to deploy the environment
<target_runner> that will specify in which VM your application will be deployed
- More informations about each step can be found here
- If you have another environment let's say staging you can add another step in the end of the file like this:
 - component: $CI_SERVER_FQDN/components/docker/deploy@1.0.25
   inputs:
     branches: "staging" # is the branch that triggers the deployment
     environment: "staging" # is the environment name
     stage: deploy # deploy stage
     tag: <target_runner> # Runner in which VM you want to deploy the environment
docker-compose-<environment_name>.yml in the root directory
3. Copy/Paste the following configuration and replace <application_name> with your application name:
version: '3.8'

services:
  <application_name>_<environment_name>:
    image: ${CI_REGISTRY}/${CI_IMAGE_NAME}:${VERSION}
    container_name: <application_name>_<environment_name>
    restart: always
    env_file:
      - .env.<environment_name>
    ports:
      - "<gateway_exposed_port>:<your_docker_exposed_port>"
    networks:
      - <application_name>_<environment_name>
networks:
  <application_name>_<environment_name>:
    driver: bridge
docker-compose-<environment_name>.yml matching the environment. let's say stagingenvironment you will have a docker-compose-staging.yml
- Make sure to adjust the ports:
- <gateway_exposed_port>: this can be chosen to anything you want, just avoid any ports already used in this file
- <your_docker_exposed_port>: Your docker exposed port, this is usually the port in which your application runs
- Define your environment/environments in Gitlab
- You have to go to in the sidebar to
Operate > Environments - Click into
New environmentand define the required informations -
Do the same if you have other environments
-
CI/CD Variables Now you should be able to define your application variables depending on each environment.
- For that you need to go in the sidebar to
Settings > CI/CD - In the
Project variables sectionsclick onAdd variable - Leave the enviroments to
Alland in the key enterCI_IMAGE_NAMEin the value enter your wished image name -
Now you can define your other environment variables which are used by your application.
- Make sure they all start with
CI_in the key - Should the right environment if the variable is depended by the enviroment if not you can leave it to
Allwhich will be used with all environments - Make sure to click at
Masked and hiddenif your variable holds any secrets/passwords - save your variable, and repeat the process to all your other variables
- Make sure they all start with
-
WARNING:
- The
<environment_name>mentioned in docker-compose file and in the gitlab-ci file needs to be exact same.
4. Domain exposition
- Make sure to register your application domain to point to this IP
198.50.212.113 - Go to the gateway.yml file
- Add your entry by Copy/Paste this configuration:
- domain: <your_registred_domain> target: <internal_vm_ip_address>:<gateway_exposed_port> - internal_vm_ip_address: this is the VMs in which your application has been deployed to (dependent on the
<runner_tag>you mentioned in the gitlab-ci configuration) - gateway_exposed_port: this is the same port you specified in you
docker-compose-<environment_name>.ymlfile -
Do the same thing if you have other environments
-
Save and push the file, after a while (CI/CD of the gateway finishes), you will be able to access your application with your
<your_registred_domain>